
Great Fried Chicken
Great Fried Chicken
 Once, again, my subscription to Cook’s Illustrated pays off with a great recipe for fried chicken. Until now, making fried chicken involved getting in the car and finding a KFC somewhere close to the house. Although KFC has its merit, my new recipe for making fried chicken at home pays off handsomely.
First, so that I give credit where it’s due, the Cook’s Illustrated issue is #106. And, because I tend to make some alterations to recipes I get, what you read here is a bit different from Cook’s; however, the basics are unchanged.
So, it comes down to four, easy steps. If you can remember these, the ingredients come to you intuitively. Here are the steps:
- Brine the chicken in a salted buttermilk mixture, preferably for at least an hour (I do mine overnight).
- Add some buttermilk to the flour to give it a bit more crunch when fried.
- Start the process on the stovetop by frying in significantly less oil than when making traditional fried chicken.
- Finish the chicken in the oven.
Ingredients
- 1 quart buttermilk (original recipe calls for 1 ¼ cups, but I don’t buy buttermilk that way. Instead, I buy a quart jug — you’ll see why later.)
- 1 tablespoon salt (mixed in a bit of warm water to dissolve it)
- 3 teaspoons ground black pepper
- 1 teaspoon garlic powder
- ¼ teaspoon cayenne pepper (really optional, original recipe)
- 1 teaspoon paprika
- chicken (I get a Harris-Teeter value pack that has ten thighs, rather than breasts)
- 2+ cups unbleached all-purpose flour
- 2 teaspoons baking powder
- 1 ¾ cups vegetable oil (Really. I use corn oil, but canola works fine. You could use peanut oil, but don’t step out of this family of oils or the chicken will not taste right)
Preparation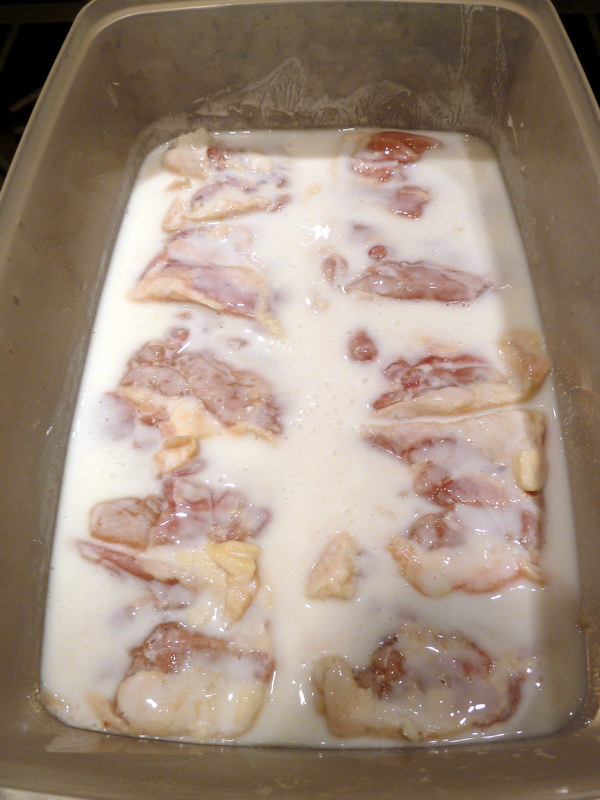
Mix these together in the jug of buttermilk:
- salt in warm water
- 1 teaspoon black pepper
- ¼ teaspoon paprika
- ¼ teaspoon garlic powder
- pinch of cayenne pepper (if you want to)
Shake it up (baby). Pour the buttermilk into a large Rubbermaid or other suitable container. Add the chicken, ensuring it’s fully covered. I place mine skin-side down for good measure. A few hours later, I’ll turn the chicken to make sure the chicken gets covered.
Leave the chicken in the refrigerator for at least four hours. I leave mine overnight. Now, don’t mess with this part. The secret to extra juicy, flavorful fried chicken is what the salted buttermilk actually does to the chicken. Skipping this step yields really dry fried chicken. The buttermilk contains lactic acid, which activates enzymes that are naturally present in the chicken as it penetrates the meat. The effect is to tenderize the meat. The salt component allows the meat to retain more of its moisture as it cooks, thus really great fried chicken!
About an hour before you are ready to start frying, take the chicken out of the refrigerator and put it on the counter. Let it warm up a bit (don’t leave it there for hours, just long enough to take the chill off of it).
Mix the flour with:
- the rest of the pepper
- garlic powder
- cayenne pepper
- 1 teaspoon salt
- baking powder
- 2 tablespoons of the buttermilk

It’s important to get the oil hot, but not burning. I use a gas range top, and I can get it just right with the setting you see to the right (mid-way between high and low). Remember that the chicken will actually cool the oil down when you start frying it.
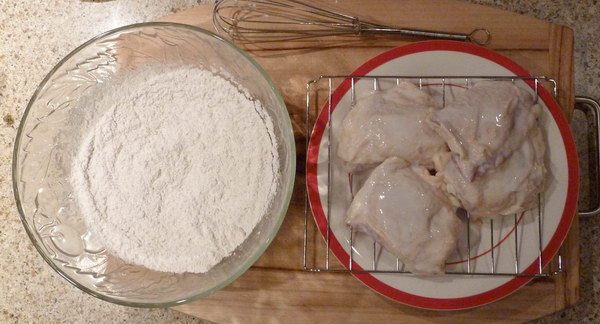
I like to set the chicken on a grate to let some of the buttermilk drip off of it before dredging it in the flour mixture. It’s not necessary, but be prepared to add more flour to the mixture to keep it sticking to the chicken as you go through your 10 thighs.
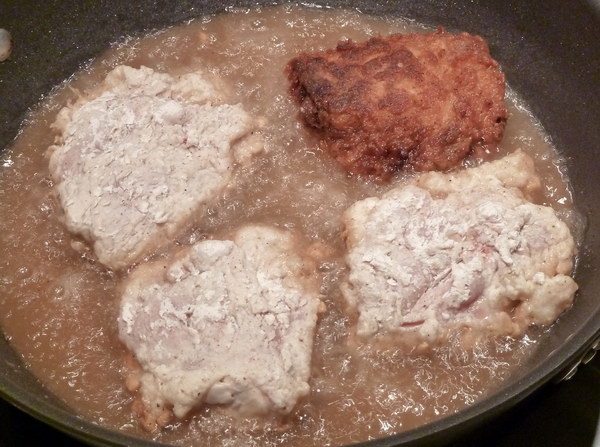
Place the chicken into the oil, skin-side down to start. Here’s a picture of one already done on the skin side and the other three about to be flipped over. Notice that the oil is not covering the chicken (as with deep frying).
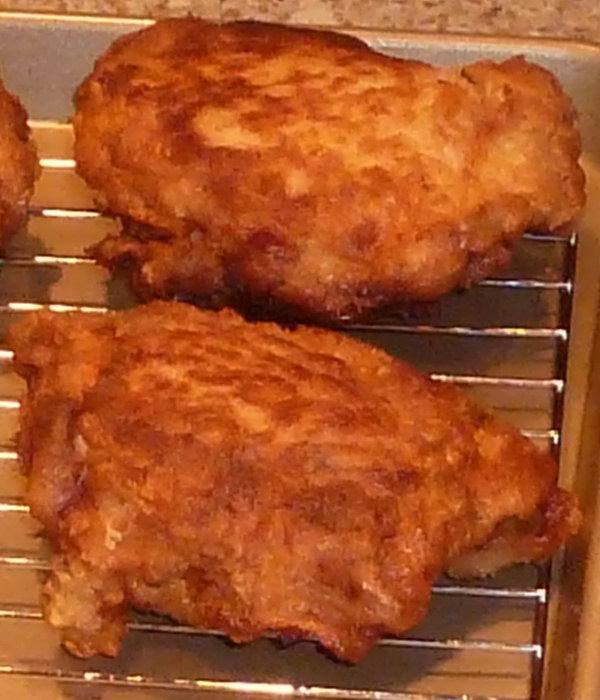
After I pull the thighs from the oil, I place them on racks in a shallow pan. Once I have a full pan, they’re ready for the oven. The racks allow the convection air to circulate around the chicken, ensuring even cooking and no burning.
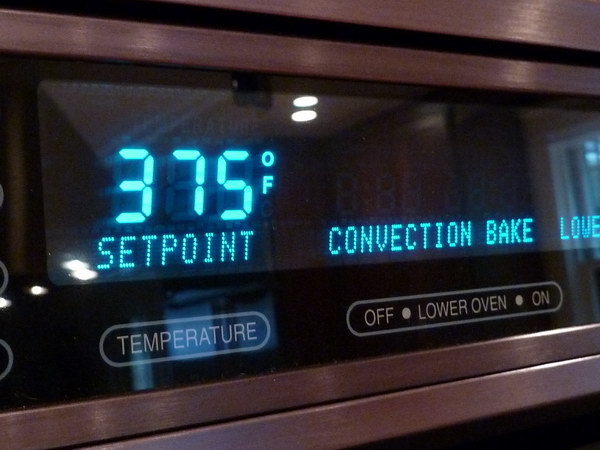
When I start frying, I set the oven. I use a Wolf electric oven, and I find that it’s a bit hotter than my Jenn-Air was. The original recipe says to set the oven to 400 degrees, which typically translates to 375 when using convection. The only caution I offer is that the chicken may not cook through to the bone, and it could get very dark or burn during the finishing process if the oven is too hot. So, you might want to experiment with this a bit. I’ve been dropping the temperature of the oven (the last time to 350) and finishing a bit longer to ensure the thighs are cooked through to the bone.
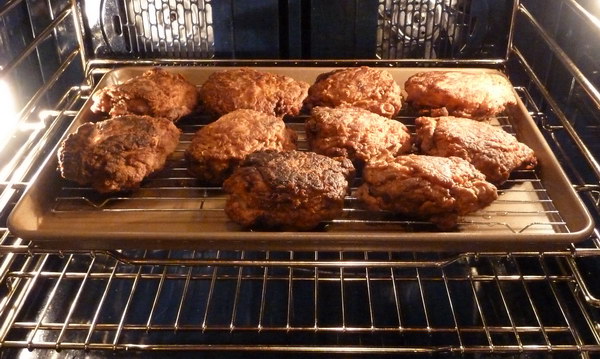
Finally, you’re ready for the finishing. Take your shallow pan filled with browned chicken thighs, and put it into the oven. You’ll want to watch it, to make sure the pieces don’t get too brown.
I find that between 20 and 30 minutes is sufficient, depending on how you’ve set the oven, how cold the chicken was when you started frying it, etc.
Serving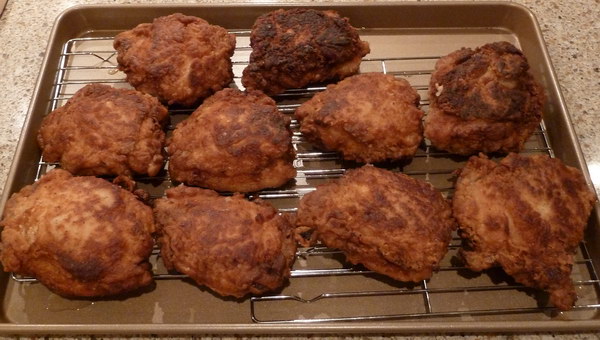
Serving fried chicken is never a problem, as long as you have potatoes you can mash (yes, even flakes will do) or (and it’s my favorite), macaroni and cheese. I’ve got a great recipe for making that from scratch, but boxed will do in a pinch.
The Wine
Usually, I’ll tell you a pinot noir would go well with this, but I just can’t bear it. I really like the taste of a crisp Sauvignon Blanc or an oaked Chardonnay any day of the week with fried chicken. Try this one, and see what you think: Rodney Strong Sauvignon Blanc Estate, 2008